Monday, January 25, 2016

01.25.16 Fabrication (part 2)


Honestly, now that I have learned the basics of stone setting, I could spend all my time thinking up new things to make, and working in the studio…but I’m getting ahead of myself.  You will recall that I started thinking about this part of the class months ago – and started looking at cabochons for the two pendants I would make in class.

I had a very clear mental image of how I wanted my Fordite pendant to turn out – and I couldn’t be more pleased with the final result.  It helps that I had really great instruction, and that because of its composition, Fordite turned out to be an excellent material for my first bezel set piece.

Once again -we started with just a couple of pieces of plain silver.  A square of 20 gauge sheet for the backing and bail, and bezel wire. The first steps were to size and shape the bezel and solder it to the silver sheet.  Because I wanted my piece to have a hammered texture, I did that first, before attaching the bezel to the backing.


At the suggestion of my instructor, I added a cut out heart to the back of the bezel - a little something extra.  I really liked this idea because it helps tell the story of each piece of jewelry.

After finishing the opening on the reverse, I cut my bezel backing to the shape I wanted, created a bail and a jump ring, and was ready to solder all my pieces together and polish them.


Setting the stone is the very last thing - so once my setting was clean, shiny and finished on the edges, I put my fordite into the bezel and tightened it to hold the cabochon in.  The result is a beautiful pendant that I am really, really enjoying.

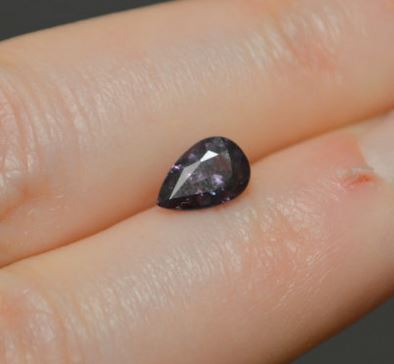
Our final week was also devoted to stone setting - this time with tabs rather than bezels.  A somewhat simpler technique (although I confess I prefer the bezels) - and good for irregular stones, it just what it sounds like - creating tabs that hold a stone in place against a backing.

For this project I chose a triangular labradorite cabochon, and decided to put an Erlenmeyer flask cut out on the back - a nod to my daughter, I'm calling this piece "chem lab".

The first steps included sawing out the reverse opening, and space in the tabs so that they could be folded over the stone.  After getting the backing filed down to the proper size, I realized I hadn't fully thought through how to attach the bail...of course...this is why we have instructors, and Shalena came to my aid.

She helped me bend up the top tab so that I could position and solder on a jump ring, then it was time to think about a bail.  I decided I wanted the bail to follow the open triangle design I had for the tabs, so I formed one using square wire.  The result was a split bail, that looked great on the finished pendant.

I learned SO much in this class - and I am so pleased with how the pieces turned out.  I'm looking forward to spending time in open studio working on my metal skills between now and my next class (probably Fabrication 201 in the spring).

Until next time.


Monday, January 18, 2016

01.18.16 Finally, Fabrication (part 1)


This post (and part 2 - which will follow next week) - are a bit out of order, and probably should have at the beginning of January - but I had other things to write about...so finally...here are my posts about my fabrication classes.

I feel like I made a quantum leap the end of 2015 when I took four weeks of introductory fabrication classes at Creative Side.  While I really enjoyed the wax carving and precious metal clay classes, neither of those spoke to me like metalsmithing. I think I have found my jewelry making calling – at least for a while.

There is something truly fulfilling about taking raw materials, working with them, and seeing them take the shape of a finished piece.  I’ve sewn since I was in grade school, and always loved it when, after a few critical seams were sewn, the oddly shaped pieces of fabric started to look like a garment.  The very same thing is true of working with metal.


We started simple – the first week was spent primarily learning to use the tools of the trade.  Hammers, saws, files, torches and mandrels enabled us to take wire and two plain looking pieces of sheet silver and transform them into rings. 


One of the most important lessons I learned in that first week – and I think a large part of the reason I have taken to metalsmithing – is that you WILL make mistakes, and the metal will forgive you.  You can heat it to soften it (called annealing), hammer to harden it (forging), mangle it and reshape it.  For better or worse, this made me just a little bit fearless!

The second week, we started building on what we had learned before.  Working with a base metal (copper or brass – I chose copper) to make a pierced cuff bracelet.  Our instructor, Shalena, had given us a weekend homework assignment – spend some time coming up with a design – so that we could get to work when we arrived at the studio.

I sat down with my jewelry notebook, a pencil, a ruler and some ideas…and quickly realized why we had been encouraged to sit down and do this at home – it wasn’t so easy.


In doing the design you have to think about so many things – not only what you want to cut away, but how big your design will be, how much metal you need to leave in place – both for structural integrity and so your work doesn’t end up just looking like a big hole.

I wanted to do some type of monogram – but realized all three initials was too ambitious – so I settled on a single letter – “H” – for my last name.  I’m not much for wearing bracelets (they get in my way), but I am still pleased with the end result.
It was during the second half of the class – weeks 3 and 4, when we got to stone setting – that I knew I was hooked.  More about that in the next post.

Until next time.


Monday, January 11, 2016

01.11.16 I see a pattern here…

My daughter and her doll
with matching dresses
My mother should have been turning 75 tomorrow.  I say “should have” because when she died at 60 – after a decade long battle with cancer – she wasn’t done living, and we weren’t ready to let go.  I wasn’t sure I’d write about her again this year – since one of my first posts was on her birthday last year – but then I realized that she is still with me (every day) and teaching me things, even in her absence. 

My mom loved to sew – she made gorgeous things – clothing, quilts, table linens…and I have her sewing machines.  I used them a lot when my daughter was young – I made clothes for her – and matching outfits for her dolls.  As my daughter got older, and we got busier – I sewed less – always presuming I would return to it when I had more time…

Instead, I found myself drawn to making jewelry, but over the past few months I have realized how many of the things my mother taught me about sewing have helped me in my fledgling metalsmith work. 
lapis pendant sketch
When you set out to make a garment, there is a specific order for doing things – you choose fabric and a pattern; then you layout the pattern on the fabric and cut; maximizing space and minimizing waste.  Once cut, you mark the pieces so that they align properly and begin assembling them in order.


pendant parts
While working on my first original piece- this lapis pendant – I realized that while the fabrication methods are different, the need for an understanding of the steps is very much the same.  You want to have a clear vision for the design, minimize waste (silver is expensive), and a plan for assembling the parts.

I was sitting at the bench, having sawed out all my pieces and was filing the edges when this realization struck me – and for one split second – it was like Mom was right next to me, just like when she first taught me to sew.

I’ve had moments where I wonder if Mom would be disappointed that I’m not sewing and using her machines – but I don’t think that would be the case.

My mom always pushed me to be my own person, to do things that felt right for me – and not give those things up under pressure from other people.  I think she would be pleased that I am making jewelry – because she was a fan of jewelry, too – and because creating beautiful things makes me happy.  I only wish that she were still here – so that I could create things for her with the same love that she sewed into every stitch for me.
finished pendant
and a pair of Mom's earrings

Until next time.

Monday, January 4, 2016

01.04.16 Changing of the Garnet

Tanzanite pendant
Photo credit: Cecile Raley Designs
Happy New Year – and welcome to the start of Year 2 on the blog!

The end of last year I was so busy writing about opportunities to shop local, that I totally dropped the ball on December birthstones…despite having two children with December birthdays.  I do have a lovely Pinterest board devoted to them – and with apologies to the December babies - I’m going to take a little time to talk about them now, before moving on to January.

According the American Gem Society, December has three birthstones – turquoise, blue zircon and tanzanite.  A broader search on the term “December birthstones” yields an even wider array of blue stones including topaz and lapis lazuli.

Blue zircon pendant
Photo credit: Cecile Raley Designs
Over the years I’ve bought a lot of blue zircon jewelry – for myself (because, as I mentioned I have two kiddos with year-end birthdays) and my daughter, who shares my love of jewelry.  Every year since she was a pre-teen, we have given her a piece of blue topaz or zircon jewelry.  Last summer I asked her if she was tired of it – and would like something different this year.  Her response was NO! – she loves getting a new piece of birthstone jewelry every year, so the tradition continues.

The most recent of these gifts came from Yvonne Raley at Cecile Raley Designs.  I am especially fond of her engraved settings, and this pendant is no exception.  Delicate petals encircle one of the brightest zircons I’ve ever run across, and made a perfect 20th birthday gift!
Garnets.
Photo credit: American Gem Society

Unlike the plethora of options available for December, January has but one stone – the garnet - but it does come in a rainbow of colors.  There are also "color change" garnets.  Stones that exhibit color change are also called "phenomenal gems" and have been highly prized since antiquity.


Because my non-December child has a birthday in June, I've long known about alexandrite, and it's color change properties...but that garnets can also show color change was news to me.
Color change garnet - showing purple
Photo credit: Cecile Raley Designs.

Once again, Yvonne was my information source.  She posted a beautiful color change garnet in her shop, at a fraction of the price for a comparable alexandrite.  She had also just introduced a new pear shaped setting - so it seemed like perfect time for me to add a new piece of her jewelry to my growing collection.

The result is the gorgeous pendant you see below - with the same garnet, but showing more blue than red.
Garnet pendant
Photo credit: Cecile Raley Designs

Gem Select provides an excellent explanation of why certain stones show these effects: color change gems have two, approximately equal-sized transmission windows. A red gemstone appears red because it absorbs all frequencies of light except for red. A gemstone that absorbs all frequencies except for blue and red light will appear blue when the light is rich in blue wavelengths (e.g., fluorescent light) and red when the light is rich in red wavelengths (e.g., incandescent lighting).

While this one is mine, Yvonne does still have some beautiful color change stones in her store, and I have another Pinterest board devoted to garnets, with lots of inspiration for January gifts.

With that, dear readers, I am off - but I'm so glad you are back with me for 2016, and hope that your year is off to a sparking start.

Until next time.

Monday, December 28, 2015

12.28.15 Saved by the Blog

I can’t believe this is my last post for 2015 – and what a year it has been.  I am grateful to everyone who has followed along, and hope that you’ll stay with me as we move into the new year.

The last few weeks have been difficult – just watching what is going on here at home and around the world – and more than I expected it to be, the blog and jewelry making have been a source of beauty and comfort for me.  There is something so affirming about being able to work with my hands and make art – and it has given me a way to escape reality for a few hours at a time.

I’ve had so much encouragement – from my amazing family, especially my husband – my friends, my jewelry instructors, and you – my readers.  Every time one of you reads a post, I get a little electronic validation, and I can’t overstate how good that makes me feel.

When I started writing last January my goal was a post a week, and to take jewelry classes…and I did it!

In that first post I wrote:

For the past 30 years I've been in the public policy business.  For 25 of those years I've been raising children.  My nest is now empty, and I've long had a pipe dream of being in the jewelry business (although I have no formal training - I do have years of shopping and wearing experience).  That said, I'm seriously considering trying to make jewelry more than a hobby...so this is where I'm going to start.

And so it was – a start.  My world has expanded; I’ve worn more different pieces of jewelry in the past year than well, I can’t remember when; and I’ve made jewelry – I’ve cast it from wax, formed it from metal clay and cut, shaped and soldered it together (more about that soon).

This post, is not an end, but the next beginning.  I want 2016 to be the year I sell my first piece of jewelry (watch for updates when I have some things in my Etsy shop) - and I want to continue to learn, grow and share my adventures with you, my readers.

Wishing you all the best for a very happy new year.

Until next time.

Monday, December 21, 2015

12.21.15 What's in a name (or a monogram)?

"mom" tags - with kiddos birthstones
My husband and I just celebrated our 22nd wedding anniversary.  Coincidentally, someone asked me recently why, even with all three of my kids out of the house, my husband refers to me as "mom"...and not by my name.  My response - that IS my name .

My full given name is Debra Suzanne Haas.  Debra, from the biblical judge Deborah – but my mother didn’t like the spelling of longer version.  I can’t really remember using my middle name much, for as long as I can remember I’ve been Debra S. Haas legally and professionally.  It’s what has always been on my driver’s license and business cards.  It’s how I sign my name. My mother, father and husband have always called me Debra.  My parents’ friends still call me Debra, but since high school, my own friends have called me Deb.

I’d never given my first name a lot of thought, probably because for those of us born in the 1960s it was a perfectly common and normal name.  As for my last name, I didn’t realize quite how attached to it I had become until the night before I got married.

James Avery disc earrings
My husband’s last name is Hood.  All three of our children are Hood.  I remain Haas. At our rehearsal dinner, someone asked if I was planning to change my name and I answered that I wasn’t sure.  My mom, who had a wicked sense of humor, said “well, you could hyphenate it and be Debra Haas-Hood, but if ‘haashood’ is the state of being a Haas, I don’t really see the point”.  That was it, I got married, my life changed, my name did not. 

When I got married, I became a stepmother to two wonderful young boys (now fine young men).  While I insisted they treat me with respect, and as a parent, I never asked them to call me anything other than Debra, because they have a mother who loves them very much.
Chicks Picks acrylic monograms

When I became pregnant with our daughter, my younger stepson, then three, became concerned.  “What should we call you after the baby comes” he asked?  “Why would you call me anything other than Debra?” I answered.  He told me he was worried that if he and his brother called me "Debra", that the baby would be confused and stated authoritatively that starting at that moment, he and his brother would call me “Mom”. (That baby just turned 20, and arrived home from college for the holidays over the weekend).

Even now, twenty years later, I kvell when I think of that day, because since then, I really have been “Mom”.  It’s what both the boys call me, it’s what my daughter calls me, even my husband uses Mom when he refers to me, or we are talking to each other.  So, while the name my parents gave me may be the one I use out in the world, it is “Mom”, the name my children gave me, that I cherish the most.
Stella & Dot "mom" and "D" charms

Until next time.

Monday, December 14, 2015

12.14.15 Visions of Sugarplums danced in their heads

Ballet Austin Nutcracker Cast 2013 - my daughter's last show
When my daughter was 3 years old, we were invited to a mother-daughter event to see Ballet Austin's production of Cinderella.  For more than 2 hours, she sat on the edge of her seat, and when the curtain went down and the lights went up, she said to me "Mommy, I'm going to be a ballerina".

My response was "of course you are" - because all 3 year old girls want to be ballerinas.

However, my girl really DID go on to be a ballerina; for 14 years she danced at the Ballet Austin Academy, and for 10 of those years she was part of the annual cast of the Nutcracker (she STILL dances for fun and exercise).

Charms - all the roles
My daughter was so excited to be cast as an angel her first year, and I bought her a James Avery angel charm, and had the date engraved on the back, as a keepsake.  The next two years, she danced as a mouse in the battle scene, so I bought mouse charms, and by her fourth year, it occurred to me that maybe instead of putting these charms on her regular charm bracelet, they needed to be own their own...so it was...that over the course of those 10 years we created a shiny record of all of her performances.

I confess, I tired of the schlep to rehearsals and the theater, and saw the production more times than I can count...but I got involved in my own way.  I became a docent - going into schools in the Austin area to talk to elementary school students about ballet and what they will see when they attend the performance.
Backs - all the dates

Being a docent is hands down my favorite part of the Nutcracker.  There is something so special and fulfilling about the opportunity to bring an art form I love to students, who often, have never seen a live performance.  For most of my presentations I rely on the wonderful materials provided Ballet Austin Community Education staff.  In addition to the presentation itself, each docent receives a bag chock full of props including, of course, a Nutcracker. For the past several years I’ve also been the docent for a particularly special group of children – the students at the Texas School for the Blind and Visually Impaired - and I was excited to see them again last week.

When I was first asked to do the presentation for TSBVI, I was already an experienced docent.  I said “yes” without a full appreciation of what I was taking on.  I knew the students would have little or no sight, but what I did not know what the range of other special needs the residential school serves.  Some students are sight impaired, but very high functioning in other areas, and some have much more severe disabilities and special needs. Fortunately, the school has a wonderful music teacher who gave me great advice on what would spark their interest and be appropriate for her students.
A TSBVI student holds a Nutcracker

Being the docent for TSBVI made me think about ballet in a way that goes beyond the visual.  To bring the Nutcracker alive for these students I focus on their other senses.  Students hear the story through descriptive audio services when they attend the performance at the Long Center, and Tchaikovsky’s fabulous score provides signature phrases for many scenes.

In the first act, there is the ominous music that precedes or indicates the arrival of the Rat King.  At the end of the act, there is snow - which does not fall silently – but as the rhythmic tapping of 32 perfectly timed pointe shoes moving across the stage.  In the second act, each "sweet" has their own musical theme, and as we listen I ask students to imagine the taste and smell of coffee, tea, cinnamon, chocolate, almond and peppermint. 

A TSBVI student tries on a costume
The students also love the costumes. Over the years I’ve made a point of taking well embellished tutus so that students can feel the beading, embroidery and tulle – allowing them to “visualize” the garment in their minds - truly creating visions of sugarplums.

My daughter is in college now, and we attend a performance every year when she is home.  But it is my time with these special children that really helps me to "see" the beauty of this "holiday gem".

Until next time.