Showing posts with label hinges. Show all posts

Sunday, June 10, 2018

06.11.08 Let's Move - Kinetic Jewelry, Part 1

Photo credit: Hannah Wilson, CSJA
Although I'm always learning and improving my skills when I'm working in the studio, it had been quite a while since I taken a class. I was thrilled when I saw that De Pastel (my instructor for 201 - intermediate fabrication) would be teaching over a weekend right around my birthday!

We touched on kinetics at the end of 201, doing simple rivets and a hinge, and the riveted hollow form earrings from that class are among my favorites and I wear them often...but I hadn't touched tubing since, and I was excited about the opportunity to re-learn and improve on these techniques.

De sent us an email asking for ideas and the projects we had in mind.  She wrote "there are so many kinetic options in our field, this will allow me to hone the class on specific techniques you all want to learn and give you all the most information for your time in class."
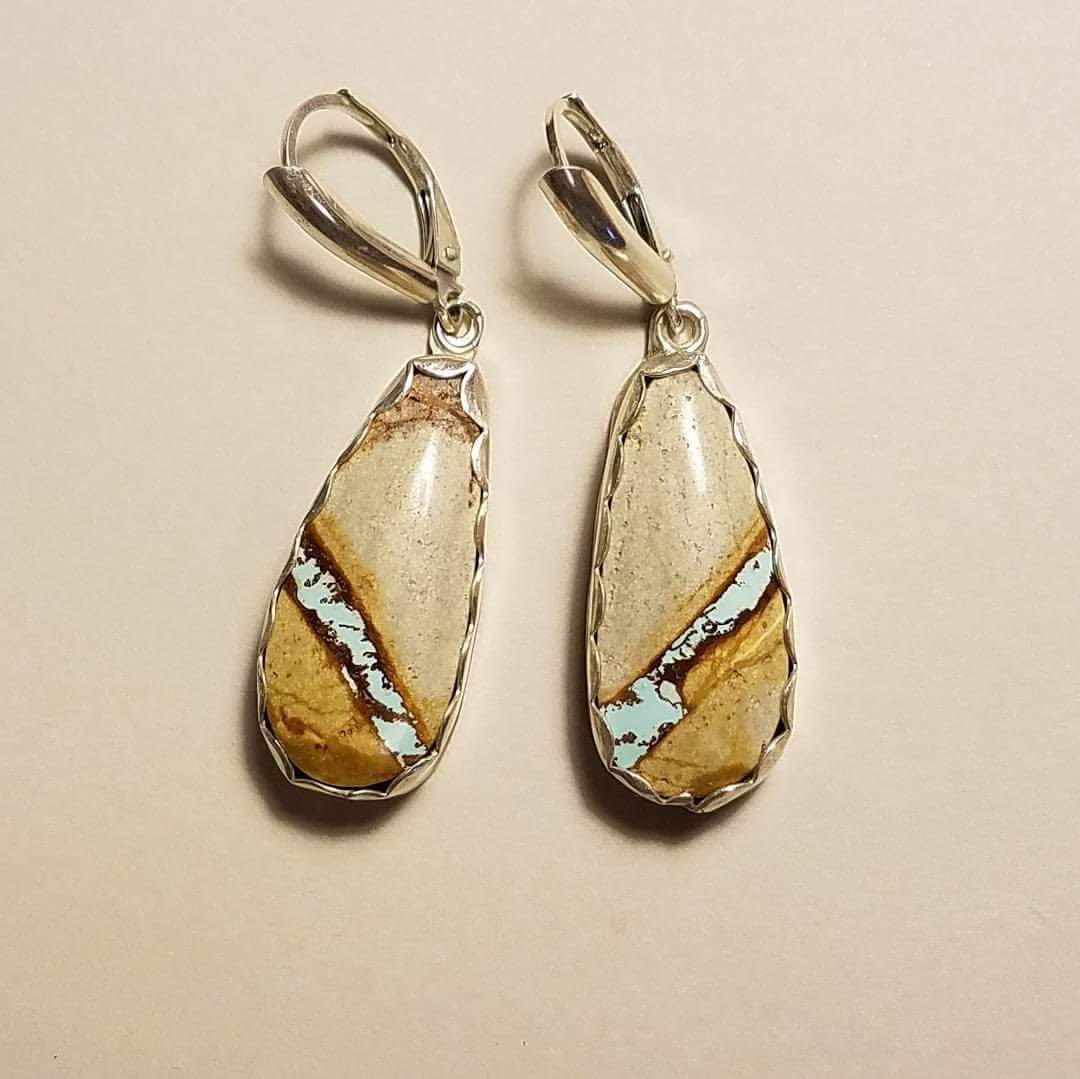
I had two things I knew I wanted to do...the first was to remake a pair of turquoise earrings with the same riveted earwires as the hollow forms, and the second was to do another hinge (I was never happy with the one on 201 pendant - mostly because even though it looked fine, I got too much solder on it so the bail didn't move).

I love the stones in these earrings - but they were an early attempt at bezel setting, and because of their depth they never hung properly from the jump ring at the back.  So I pried them out of the silver and started over.
Two years on from the first attempt (at both the earrings and working with tubing) it's safe to say that I am a much better - and faster - metalsmith.  By lunchtime (halfway through the first day) and I had rebuilt the earrings, and now they looked like I wanted them to!

I was on to the next project - a hinged bail, a lot like the one I had done previously, but hopefully with a better result.  My recollection was that this was a really difficult task - and I expected that the pendant I had designed for this project would take up most of the remaining two and a half days.


I had given this particular piece a lot of thought.  Because the stone was rectangular, like a door, and the bail would be hinged (also, like a door), I wanted to create a pendant that looked like a mezuzah (the prayer scrolls mounted on the door frames of Jewish homes).

I started with the setting for the stone.  Rather than my typical bezel, I wanted to do a type of tab setting known as "score and fold" - which is exactly what it sounds like.  I had done the piercing (the Hebrew letter Shin) a few days before class, so I was able to move directly into forming the metal to hold the stone.

Just as it had been with the earrings, cutting the tubing and getting it soldered to the setting wasn't nearly as daunting as I had anticipated...

so, there I was at the end of the first day, with both of my planned projects finished.   It was a good feeling - but it meant I had to take my tired brain home and come up with something to do next!


Until next time (when I'll tell you more about the weekend).


Monday, May 2, 2016

05.02.16 Let's go tubing! (Intermediate Fabrication - part 3)

It's May - which in Central Texas, means "summer" - so when I suggest tubing, you might think I'm referring to floating down one of our many lovely rivers in an inner-tube. Indeed, that kind of tubing is a great and relaxing on a hot day, but today I am referring to actual tubing...made of silver, with thick walls and a hole in the middle. I used thick walled 4.5 mm tubing to create the bezel for the blue zircons on my oval hollow form earrings.

After finishing those (and deciding that I like fabricating hollow forms), I started second pair, with a teardrop shape.  Rather than using a traditional jump ring, I used very narrow tubing to hold the earwires. Soldering the tubing to the top of teardrops was a great practice run for fabricating a hinge, our final project. 


Creating a hinged piece involves soldering tubing to two different pieces of metal, then connecting them by running a wire through tubes and riveting (flattening) the ends.  This allows multiple parts to be connected, but move.  We practiced with copper sheet before moving on to fabricating our last piece in silver.

I decided I wanted to make a pendant with a hinged bail.  I needed to make sure that I measured carefully so that I could cut across the top of my round backplate and create a straight edge for soldering my hinge.  As I like to do, I made a sketch (to scale, using graph paper) and decided to put a moon cut out on the reverse.


I wanted a piece that complemented my teardrop earrings (which I set with black spinels), so I designed a round pendant with a black teardrop stone. I'm calling it "Dark Side of the Moon".


After getting approval for my design, I set about creating the bail and hinge for the top of the pendant. In addition to cutting the pieces of tubing to be right size, it is critical that they be aligned when they are soldered on, so that the pin can slide through.

If the hinge pieces are crooked, it's not going to come together properly. In order to line up the pieces for soldering, we put a piece of graphite (mechanical pencil lead) through to hold them in place, and then I was able to attach them to my pendant.

After assembling and polishing - I bezel set a teardrop shaped black onyx - and in just four short weeks, I had a whole new set of metalsmithing skills under my belt.


I'm pretty pleased with the result of my classwork - and I'm looking forward to my next Creative Side class, argentium earrings with Ronda Coryell.

Until next time.