I had already decided that the class, and everything I made over the weekend, was going to count as my birthday presents. Finishing the two planned projects on the first day didn't change that, it just meant that I was going to have bonus pieces of jewelry! The challenge was - what do I want to do next?
I like all the stones that I buy - and I have accumulated a pretty substantial collection (as in, if I weren't to buy anymore I could work for quite a while before I ran out) - of those, there are few (well, ok more than a few) that I have absolutely no intention of selling once they become jewelry.
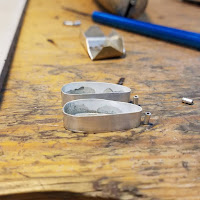
I chose two relatively small stones - a sterling opal and an ammonite - and decided that I wanted to work on riveted bails. But, before I did anything else, I had to cut out the backs of the pendants.
 |
| Photo credit: Pixar |
The ammonite was easy. When the fossil shell is cabbed by a lapidary artist, the patterns look like oak leaves, so I chose an acorn - because at our house we like to say "the acorn doesn't fall far from the tree".
The opal was a little more difficult, until I remembered Heimlich, the bright green caterpillar from A Bug's Life - and decided that not only would a do a rivet, but I would give the pendant wings!
The hinged bail I had done on the first day turned out beautifully - but to do it requires that the top of the setting be flat (or that the metalsmith is more skilled than me). With a rivet, you get a really similar look, but it's more forgiving because it only requires one piece of tubing, rather than lining up three pieces for a hinge.
The hinged bail was done entirely with telescoping tubing (placing a smaller tube inside the hinge to hold the pieces together). The hinge mechanism was created from three pieces of larger tube held in place by a single piece of smaller tubing that fits inside. The rivet is created by flaring the ends of the smaller tube so that can't slip out.
 Riveted bails can be attached either with telescoping tubing or with wire through the piece that is soldered to the setting for the stone. I decided to do one of each.
The acorn pendant was simple. A small piece of tube soldered to the top of the bezel, and a wire with balled ends to hold it on.
The two part rivet - with both tubing and wire - was more involved, but not really that much more complicated, especially after making a hinge.
 After fabricating the bezel and wings for Heimlich (yes, I'm going to call the pendant by its name) I used a small piece of tubing to connect the three pieces. Then, I connected the bail through the tube - so that the pendant, wings and bail can all move independently.
The rest of the day involved things I do all the time - filing, polishing, setting the stone and finishing. At the end of day two, I had four new pieces of jewelry...and was on notice from De that I had to step out of my comfort zone and push myself on the last day of class.
Until next time - when I'll finish my story.


