 |
| Photo credit: amazon.com |
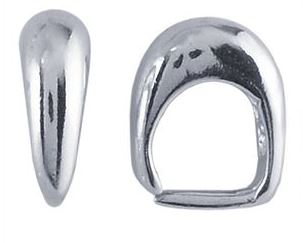 |
| Photo credit: Rio Grande |
 When I made my lost wax pendant over a year ago, I put a simple silver jump ring on it and wore it happily. Then I put it on a few weeks ago and thought it didn't look "finished" and it needed a bail. I went to the Rio Grande website, and found a lovely argentium bail that looked like a perfect match to my pendant. I ordered it and took the pendant and bail to open studio, where replaced the jump ring. I couldn't believe the impact of that small change, it looked like a completely different - and truly finished - piece of jewelry. The jump ring was just a way to hang the pendant on a chain, the bail truly completes the piece.
In some ways, telling this part of the story first is putting the cart before the horse...
 I started thinking about bails in my Fabrication 101 class, when I began making pendants. The first one, for my Fordite pendant was incredibly simple; the wire one I made for my laboradite was a little more advanced - the bail followed the shape of the prongs.
As I started working in open studio I began to think more and more about think about the bail as an important component of each piece. So much so that I ordered a bail template and some specialized wire to customize each bail to the piece.

Having the template is great - I made paper versions of each bail (something I'm doing a lot right now - mocking up pieces with paper - to get a sense of how they will look) - which I can use to to see exactly what size I want for the piece.

This is how I know I am starting to think like a jeweler - I see the components separately, but think of them as something much greater than the sum of their parts.
Watch this space for more bails!

No comments:
Post a Comment