Monday, December 23, 2024

12.23.24 Time of Inconvenience

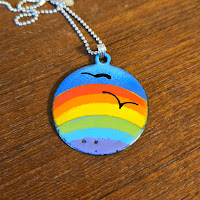
Tea towel from Time Capsule Designs
We're living in the age of communication
Where the only voices heard have money in their hands
Where greed has become a sophistication
And if you ain't got money
You ain't got nothin' in this land
An' here I am one lonely woman
On these mean streets
Where the right to life man has become my enemy

-- Nanci Griffith, Time of Inconvenience (1994)

I've been listening to Nanci Griffith a lot in the past few weeks.  I find her thirty year old songs have a very current resonance (or maybe I'm just old).  

After returning to the blog this summer I thought I was back on the wagon...but I couldn't write anything in November, I just didn't have it in me.  The election was devasting - both nationally, and here in Texas.  I'm still trying to figure out in what world Ted Cruz beats in Colin Allred...apparently, the one we live in.

The earrings that were
my first project last year

I had a lot more hope this time last year than I do right now, but I'm trying to be optimistic...and part of that includes looking back on the really good things that happened for me in 2024.

In January I went back to jewelry classes at ACC - and it was amazing.  I knew I had missed being creative, I just didn't know how much.  It was wonderful to work in a community setting, to see old friends and make new ones, and to be actively engaged in learning.  I can't wait to start again in in a few weeks - I'll be taking metal engraving for the first semester of 2025.


In February we went to DC to spend time with friends and family - a trip we make every year to celebrate the birthday of my favorite (and only) great niece - we're already booked for the weekend of her party in a couple of months, she'll be 6.

With Mary and Mrs. K
It's always a jam packed few days - this past year we were able to squeeze in a visit with one of my best childhood friends and her mom.  I'm so glad we did - it turned out to be my last visit with Mrs. K - in the home where I spent so much time, and have so many wonderful memories.

March marked a full year since my gallbladder surgery. I have made a complete recovery - something that would not have been possible without so much support from the people around me - my wonderful family, incredible medical staff and my friends.

One of those friends in particular, Abby, was there for pretty much the whole gallbladder saga. She comes to Austin every March for SXSW, and I had just seen her in 2023 before I ended up in the hospital.

I couldn't exercise - even gentle yoga - for quite some time after the surgery; but in lieu of our usual practice Abby helped me with guided meditation through my convalescence.  This year there were no surprises - before or after her trip to Austin - and we were able to see each other twice during her brief stay.  Bonus - she was back for a quick visit and we attended an amazing yoga workshop together just a couple of weeks ago.
Things are always busy around here in the spring, but this year saw a massive influx of visitors in April because Central Texas was in the path of totality for the solar eclipse.

While people came in from all over the world - including a childhood friend of mine who now lives in Amsterdam (it was really fun to see her) - we opted to watch from the end of our driveway.

The absolute peak of our year came in May.

Dr. Hood, and her very proud parents


There is nothing like the joy and pride that comes with watching someone you love achieve their goals...especially if that someone is your child.

In May, our daughter graduated from UC Berkeley with her PhD in molecular and cell biology.  Not only were we there, but her village showed up for her.  We were joined by family and friends from near and far to watch her receive her hood - my only regret is that my parents, especially my father - couldn't be there with us.

Graduation ring from Estudio Zanny

While graduation was the highlight of the week, we did some fun tourist things, too.  The weather was beautiful, we visited both the University of California and City of Berkeley botanical gardens (if you've been here a minute you know I love flowers as much as jewelry).  

We laughed, we cried (well, I did) and we ate wonderful food.  Like her brother's wedding a couple of years ago, it filled my heart. She got a ring, too - but I didn't make it.  Cal's colors are blue and gold so we gave her a beautiful sapphire from my dear friend Zanny Cox.


Simple round link chain

Once we got home I was back at ACC in summer school for June and July, and focused on one big project - making a mixed metal trombone link chain.

Making chain was a new skill for me.  I had made a simple link chain with various sized jump rings during my first semester, and enjoyed the process. 
 
I'd been looking at vintage trombone chains for some time, but hadn't seen what I wanted at a price I was willing to pay, so I asked my friend and teacher De if I could focus on that during our short semester.


Trombone chain and t-bar
Her response was both positive and enthusiastic - and my idea lined up well with a class project.  The first thing she suggested was that I prototype the idea in copper - so that I could work through the design and to determine how much metal, especially gold, I would need to order.

I learned so much making this piece, and it has become a staple in my jewelry wardrobe. If you follow me on Instagram, you'll see this chain showing up regularly - sometimes on it's own, or with the t-bar or charms attached.

Not quite as big an accomplishment as a PhD, but I'm pretty proud of the metalsmithing I did.

Navajo pearls from Santa Fe

In August my husband and I did something that we had not done in a very, very long time...we took a vacation by ourselves...not a family trip, not an add on to someplace one of us was going already. A real vacation, and we had so much fun just the two of us that we're going to do it again in 2025!

We drove to Santa Fe and had a wonderful week - just being together and enjoying everything! The skies and scenery were amazing.  The museums - incredible - so was the food, the art and of course, the jewelry.  I came home with some lovely souvenirs.


Twisting steel to make a tool
In September - for the first time in more than 30 years - I was the only one in the family going back to school. Our daughter, PhD in hand, started a postdoc position...and I was signed up to learn a completely new skill - stone setting.  It was a great class - not only was a going to learn new jewelry skills, but I had the opportunity to make my own steel setting tool.

I had fun and it made me a better jeweler - but the most important thing I learned is if I want something set with small stones, I will pay someone else to do it.


At Wellfleet Oysterfest
The calendar may have said fall, but the temperatures continued to say SUMMER into October.  Fortunately, I was able to escape to Cape Cod with my girlfriends.  The weather was gorgeous and the company - well - these women have been my friends for the better part of 50 years, and they are my ride or die.

I know from people I talk to that our friendship is a rare and beautiful thing.  


We grew up together - then for the better part of 30 years we were scattered - only seeing each other occasionally, and rarely all together.  Late in 2021, as we were able to get vaccinated and beginning to come out of our Covid holes, we reconnected as a group...it was though all that time just evaporated...and we've been getting the band back together once a year ever since.

in the sound booth
As I did with the blog, I'm just gonna skip November...

Despite no longer having a dancer in the house, it's not December without Nutcracker.  Once again I had the pleasure of visiting the Texas School for the Blind and Visually Impaired as a docent for Ballet Austin, and then being in the sound booth to do the descriptive narration when the students attended the performance.

It always brings me joy to end the year with my Ballet Austin family.  I started as a docent more than 20 years ago, and I love being a part of the production even though I'm no longer a Nutcracker parent.


I've never been more grateful for "my people" than I am today. If you are reading this, you are a part of that community (pretty sure the only folks who read my blog see the notices on Instagram or Facebook) - and I am glad that you are here.

I have no doubt that the next four years are going to be difficult - but we will get through them the same way we did before - by showing up with and for each other.

Until next time.


Monday, October 7, 2024

10.07.2024 Let's Do the Twist

Twisting steel with help from Russ
I can't believe we are already at the halfway point for the fall semester at ACC. I'm taking stone setting, and for the first time in almost a decade of jewelry classes, I'm not actually making finished pieces*.

Yep, you read that right.  This class is all about learning new techniques -  it is one of the most challenging courses I've ever taken (jewelry or otherwise) - and I couldn't be happier about it.

We are making things - just not the kinds of pieces I've made in the past.  For starters, we're working with different materials.  First up - steel.

We began the semester by making a setting tool to burnish flush set stones.  Each of us were given a piece of quarter inch (square) steel, six inches long, that we twisted and then ground to points on each end.

My finished setting tool

With the help of instructors and classmates, we placed the steel in a vice, heated it until it was red hot, then twisted it to make a pattern.  More important that making the tool pretty, it creates groves that make it easier to grip when trying to move metal around a flush set stone.

After the twisting, we used a belt sander to grind down the both ends - one to a sharp point, one to a more rounded point - and then finished on the deburring wheel.  We each ended up with a fabulous tool - and while it may not be jewelry, I think it's very pretty.


Flush set CZs in brass
The purpose of this lovely little rod is to be able to push down metal around a stone to hold it in place in a flush setting.  We did our practice settings in brass, so we need a tool that was hard enough to move another metal.

After doing the flush settings in brass, we moved on to bronze - because it has a hardness close to gold (and at over $2,600 per ounce...well, we aren't going to work in that).

Four prong settings - CZs in bronze


When I first started metalsmithing - in 2015 - I imagined it would be fun...but I had absolutely no idea how essential it would become to maintaining my mental and physical health.

Initially, it filled an empty space in my life - after decades of being a full time mom.  

Then, it became a place where I could be creative, and I found a community.  


During Covid I realized how much I missed both the creative work and the people. Now that I am back at the bench - especially as a student - I realize how much happier I am when I'm making and learning in a shared space.

As for my physical health...at 61 I have outlived my Mom.  My Dad lived into his 70s, but by his early 60s he was already beginning to show the signs of Parkinson's Disease that would slow him down until, at the end of his life, he really wasn't doing much living.

Parkinson's is hereditary - there's no diagnostic test, and there's no cure - but there are ways to potentially delay its onset including keeping both your brain and body active.  Taking jewelry classes is a big part of that.  In addition to my regular yoga practice and walking, jewelry class makes me use my hands and maintain my fine motor skills, and it absolutely helps me build new neural pathways.

So, I might not be making more shiny things in this class - but I am definitely working on being around and healthy to wear all the things I have.

Until next time.

GOLD! Watch for some new things.
*De, our instructor, did tell us it would be a good idea to have a personal project or two, because we will get frustrated and need to turn our attention to something else occassionally...so despite the price, I've purchased some gold so that I can take advantage of both the bench time and her knowledge.  Stay tuned!


Monday, September 9, 2024

09.09.2024 Get Your Kicks on Route 66

Last month my husband and I went to Santa Fe...it was very different from the other trips I've written about over the years in a couple of significant ways...

Outside our room at the El Rey
- we drove - we almost always fly (generally because we are going to one coast or the other),

- it was just the two of us (usually I'm playing travel agent and cruise director),

and (not that I don't love seeing my family and friends) it was absolutely delightful!

We stayed at the El Rey Court, located on historic Route 66; it was a lot of fun...they had a nice pool, great pop up dining and tolerated us old folks hanging out among the hipsters.

We were there for a week, which gave us plenty of time to visit museums, walk around the Plaza and on Canyon Road, eat lots of wonderful food - and of course - shop for jewelry.  No surprise, I came home with a number of wonderful souvenirs (since this is ostensibly a jewelry blog, I'm going to write about those).

Navajo pearls from Malouf on the Plaza
I knew I would be able to find lots of silver - which made me very happy because I'm a white metals gal - and I had two items on my souvenir wish list: Navajo pearls and a spiny oyster pendant.

I started on the Plaza, where there are two famous jewelry stores and one of them - Malouf's - is where I found my Navajo pearls.

Navajo pearls are not that hard to find - but they are often large and heavy - and I was looking for a smaller (preferably) graduated strand.  Mitzi at Malouf's was wonderful and quickly put her hands on exactly what I was looking for.

The strand is just over 20 inches long, and the perfect length and size for layering.

While walking around the Plaza I also found a lovely shop with stones and vintage jewelry, and acquired a composite oval (which will become a pendant) and a sweet pair of vintage squash blossoms that I've turned into earrings.

The other two finished pieces I brought home came from artist vendors at the Railyard (also home to a fabulous farmer's market - although I didn't buy anything perishable).
The artists actually outnumbered the produce vendors - I had an absolutely wonderful time walking through all the booths and talking to the jewelers.

I  found the spiny oyster pendant first. 

PM Walsh spiny oyster pendant
I was looking for this particular stone because I have several pairs of earrings - including this pair (a souvenir from a previous trip, acquired at Santa Fe on the Strand in Galveston) but I wasn't wearing them very often.

Pablo Walsh had a gorgeous display of both cast and fabricated pieces - including an array of heart pendants - for which I have a soft spot. We had a delightful conversation about his work (he spent time working in Dallas in fine jewelry), the difference between Texas and New Mexico, the the joy of making.

Kathy Burhans chain
I wore the pearls and pendant layered while we were in Santa Fe, and once we got home, I was even more delighted to see how well both pieces work with the earrings!

The second market purchase (I guess you could say even without produce, I had a good #MarketHaul) was a beautiful chain featuring alternating oval and twisted barbell links, finished with patina.

After completing my trombone link chain, I've developed an eye for interesting chain - and this one was just to good to pass up (I spent some time talking to Kathy Burhans, the metalsmith, walked away, then went back to buy it.)

We did much more than shop - but I always love to highlight makers I meet when we travel. I'm now following them on social media and hope you will, too.  Although we covered a lot of ground, there are many things we didn't get to in a week, and we're already talking about a return trip.

Last, but not least - we did pull over at a Texas stop sign, because (to quote my father) "it's not a road trip without a Blizzard."

Until next time.


Sunday, August 11, 2024

08.12.2024 T is for...

The chain - with my Mom's gold hoops
Trombone (links) and t-bars.

I finished my summer classes at ACC the end of July, and the promptly went on vacation (more about that another time) - but in my catch up last month I promised a full post about making the chain, so here it is.

You might recall that when I wrote about this chain, I mentioned I had been eyeing vintage trombone chains (so called because their long, oval links look like trombone slides) for some time.  

They are expensive - and what I really wanted (and had not found) - was one that was primarily silver.

With almost an entire semester in front of me, and experience making a simpler chain in my spring semester class I decided that this was going to be my focus for the summer session. 

Prototyping in copper
Given the cost of the metals (the gold for 15 small links was over $500) my instructor encouraged me to make a prototype in copper before placing any orders.  I did, and that process helped me determine not only how much metal to buy, but also what size wire to use for the links.  

I definitely wanted a substantial chain, but not so heavy that I couldn't wear it comfortably.  I settled on 12 gauge wire for the large oval links, and 14 gauge wire for the small round links (in both silver and gold).


Having determined how long I wanted my chain and how much wire I would need, I placed my order and got to work.

Side note: wire gauges are standardized based on the amount of electrical current they can carry - and they date back to the 19th century.  Both gold and silver wire CAN conduct current, but because of their relative value, they are not generally used.  Most modern electrical wiring is copper, but all wiring - whether or not it is used for jewelry - follows the same gauge measurements.

Six feet of wire, reduced to links
It takes a lot of wire to make chain.  

I ordered a little over six feet of wire (five feet of silver and just over a foot of gold) in order to make a 20 inch necklace.  I formed the oval rings using pliers, and the circular ones on a jump ring maker (yay for all the toys in the ACC Jewelry Department).

Each circular ring used about an inch of wire, and the oval rings took just over two inches.

Once the links were formed and shaped, they needed to be soldered.

In the tumbler to polish
The silver ovals and gold circles were all soldered closed, and then I connected the links - one at a time - by soldering the silver circles between the oval and gold links.  Getting all the links connected was an accomplishment, but I was by no means close to finished.

There was a lot of clean up to do - extra solder had to be sanded off each joint (there are a total of 60 solder joints in the chain).  Sanding was followed by additional pre-polishing and finally, after the chain was assembled - including the clasps - it went into the tumbler.

The second part of the project was making a t-bar.  I styled my chain after vintage watch chains - with swivel clasps on each end - which often had t-bars to hold the pocket watch chain in a buttonhole.


T-bar components - unassembled

My classmates were making a toggle clasp for a bracelet -  I modified the assignment to make a larger toggle to hang pendant style from my chain.  

Throughout the semester, our instructor had been saying that all the skills we were building would be required - and tested - in the making of the toggle.  She was not wrong.  

Even with a substantial amount of soldering experience, making the t-bar was a challenge!

Fabricating the t-bar required fitting small jump rings on the center of the bar, and soldering all the pieces together to create a long barbell with a center bail.

The chain and t-bar
With a little help - and quite of bit of patience - I completed the t-bar as well as the chain and I'm really enjoying wearing it.  

I'll be going back to class in a few weeks, and for the first time since I started taking classes (almost 10 years ago) the goal won't be to actually make anything.  Instead, I'm going to be taking stone setting which involves learned to take pre-cast settings and modify them to accommodate faceted stones.

After two semesters of fabrication review I'm ready to focus on learning something completely new.


I'll still have access to the benches and all the wonderful tools at ACC, so I imagine I will continue to make things for myself (and maybe others) - but I won't be adding to my jewelry collection in quite the same way.  I will, however, continue to post and write about what I'm learning.

Between now and a stone setting post, I'll be sharing our recent vacation in Santa Fe.

Until next time.


Tuesday, July 2, 2024

07.02.2024 It's been a minute

It had been my intention to write a blog post every month for 2024, but since that didn't happen there's no time like the present to get caught up.  

Spring in Austin - which was lovely, by the way - is long gone and we are now firmly planted in summer with weeks of 100+ degree days and little rain.  Fortunately, we have air conditioning.

Here's what's been going on...

40+ MPG in my new car
When I last posted, in March, among other things my car (still waiting for repairs from hail the previous September) had just been in a fender bender.  That was the end for my 2019 CRV. I am now the proud owner of a 2024 CRV Hybrid...wasn't planning on replacing my car, but having the hybrid is really nice...

I didn't manage to write anything in April  - which was filled with celestial wonders, visits with friends and celebrations.

Watching the eclipse in Austin


Austin was in the path of totality for the solar eclipse. Lot of folks - including a childhood friend who now lives in Amsterdam - came into town to see it, which meant a wonderful opportunity to visit in person. We spent an afternoon catching up on the past 30 years.

As for the big event, there were a lot of clouds that day, but they parted long enough for us to observe the strange, quiet darkness that occurred when the moon passed directly between the sun and earth.


At the end of the month I celebrated my 61st birthday and attended not one, not two, but three Passover seders (first, second and last nights) more than making up for last year when I missed out entirely because I was recovering from emergency gall bladder surgery.

All of sudden, it was May. I finished up at ACC with a collection of new pendants, including two - a tourmalinated quartz and an opal - set with gold.

Just after my semester finished, we took off for California to watch our daughter receive her PhD in molecular and cell biology from the University of California at Berkeley.  

We had an absolutely wonderful week. 

Having a very proud mama moment
The weather was spectacular, we had friends and family with us, we did some sightseeing, and of course, saw our daughter recognized for years of scholarship and hard work.

We returned home with just enough time to do laundry, clear the desk and fill the fridge before I started summer school at ACC, in June, with my longtime friend and teacher, De Pastel

I'm registered - once again - for Jewelry Techniques 1, which is the course I took with Steve Kriechbaum in the spring, but every instructor brings their own flavor to a class, so even with the same curriculum, I am learning new things.

In the first week De took us through a series of basic exercises - with a 2x2 inch square of copper - that demonstrated sawing, soldering, riveting and using the flex shaft.  

It was an amazing set of lessons with a minimal amount of metal.  Even though I've done all of these things before, it was a great refresher before diving back in.  
Designing and prototyping

I made a relatively simple chain last semester, but really wanted to focus on basket settings for faceted stones.

This session I want to work on a larger and more complex chain.  I've been eyeing vintage trombone chains (so called because their long, oval links look like trombone slides) and decided that rather than buy one - I'm going make one in silver and gold.

Given the cost of the metals, De suggested - and I accepted - that I should make a prototype in copper before placing any orders.  I did, and that process helped me determine not only how much metal to buy, but also what size wire to use for the links.  

Making the chain has been an incredible learning process - and definitely deserves its own post.  You can check out the progress pictures on my Instagram, and come back in August, for the whole story.

Until next time.


Monday, March 11, 2024

03.14.2024 March Madness

My basket set pendants

Those of you who follow my Instagram account might remember that on Monday I put up this cute photo of my pendants, with the message that internet goblins ate the blog post I had all ready to go for March, 

My CR-V post impact


and THEN later that day I posted THIS photo of my car, after getting hit on the way home from running errands and stated there would be no blog post this month.


Today, after hours on the phone dealing with insurance, I changed my mind and decided I needed to write.

Originally, I had titled the post "A tisket, A tasket" because I was writing about making basket settings, and couldn't figure out how to tie that to basketBALL. I had considered "Slam Dunk" or "Nothing But Net" but those didn't work at all

Then Monday happened, and I decided that this week has, in fact, been madness...so that's the title I'm going to use...and now I will attempt to reconstruct my story about making basket settings for pendants.

I put a fair number of progress pictures up on my IG account, but I thought you might find a narration of the process interesting...so here goes.

An early - and still favorite
bezel set turquoise
I have set a lot of stones along my jewelry making journey, but they have all been bezel set - which means a piece of sheet metal was fitted tightly around a cabochon (flat backed stone) and soldered (or fused) to a backplate (another piece of sheet metal) to create the setting for the pendant.  

Bezel and basket settings use the same materials - sheet metal and wire (they can also be carved in wax and cast in metal) - to create the framework for the pendant, but that's pretty much where the similarity ends.


Beginnings of the basket
As with bezel setting, geometry and order of operations are critical for creating basket settings - maybe even more so.

For a basket setting you do shape the metal to match the shape of the stone - but these stones are faceted on the back - so instead of fitting inside the metal, the stone sits on top of the setting.

Instead of adding pieces to make the setting - as you do with a bezel pendant - you cut metal away to open up the basket.

I started with the turquoise because it's much easier to build a setting - any setting - for a round or oval stone than for one with corners like the tourmaline.

First set of prongs


After forming the sheet metal, and making sure the stone sits properly on top of it, you begin to cut away the center portion of the metal - leaving two thin bands.  

It's important that you only cut halfway around the setting at first, otherwise you will have two completely separate wire-thin pieces and completely eliminated the advantage of fabricating the basket from sheet.


Once the basket is half open, you attach the first set of prongs - which gives your piece stability while you open the other side - and then attach the other set of prongs.

Oops
The process is essentially the same for a square or rectangular stone, but there are corners - and those are tricky.  The base has to have 90 degree angles; to achieve those you create mitered corners by filing into the sheet metal before you bend it, and then you solder the corners to reinforce the metal.

If you file too deep - or get your metal too hot - your box will fall apart and you get to make it again...all part of the learning process.

Using 3rd arms to hold the piece in place

The second attempt at the rectangular setting went better, and faster, than the first...and turned out quite well.  Same process once I had the base constructed - cut out one side, solder carefully, cut out the other side, and finally attach a bail.

When making a pendant, you do need to leave a small piece of solid metal at the top of the basket so you have a place to anchor the bail.


A word about adding the bail.  That went much better on the second pendant as well - and had nothing to do with the shape of the basket.

Ready to polish and set

For the turquoise pendant, I got everything set up and attached the bail using pick soldering (picking up the solder with a special tool and placing it where it will flow and attach pieces together).  That works great, except when it doesn't, and because my solder didn't flow on the back side of the bail, I ended up melting it off and doing it twice.

For the tourmaline, I opted to sweat (melting the solder on to the frame before placing the bail down) solder the pieces together - learning from my mistake - and it went beautifully.

None of these setbacks were particularly frustrating or problematic - they were simply opportunities to learn - which is why I signed up for classes in the first place.  I went back to the bench with a desire not so much to make more of what I had done before, but to challenge myself to make new and different things.

Cookie - keeping me company
ACC is on spring break this week - but I'm excited to go back and fabricate another basket setting, or two, before the end of the semester. One of the truly wonderful things about being a continuing education student is that I can sign up for the same class more than once - so it's my intention to take Jewelry Technique 1 again, and continue to learn from master goldsmith Steve Kriechbaum.

Watch this space - there's definitely more to come!

Until next time.


Monday, February 19, 2024

02.19.2024 Chain, Chain, Chain...

The second class project in my ACC jewelry techniques class involved making jump rings and connecting them together to create a chain.

Jump rings - for the non-jewelry types - are the open rings used to connect components of a piece together.  They are used to make loops for hooks on earrings, as simple bails for hanging a pendant or to attach a clasp to the end of the chain.

Jump rings - off the mandrel - before being sawed apart

I decided I wanted to fabricate a necklace with graduated links.  I sketched my idea in my notebook, then calculated the size - and how many of each - jump rings I would need.

The inspiration for this necklace came from several other pieces - a beautiful string of graduated pearls my Father brought home to me for my 21st birthday, from a trip to Japan; the Pat Areias silver statement chain I bought last summer in Carmel, and a round push lock charm holder from Cari Streeter, one of my favorite jewelers.


I settled on the design, with the push lock in the front, and small double rings to connect the links. Then I made jump rings...a lot of jump rings.

You can buy preformed jump rings (open - with a cut in the ring, or closed) - but where would be the fun (or learning) in that?  

The facilities at ACC are amazing - and they have all the toys - including a jump ring maker.  You wrap a piece of wire around a mandrel, and put the mandrel in a vice with a crank, turn the handle and voila - a stack of jump rings (that look like a spring).  

Laying out the necklace before fusing the rings
Once you have a coil of rings, the next step is to saw through them one at a time, then finish them by aligning the cut edges and making sure they are truly round.

I made the larger ones (30 for the necklace, plus a few extras) and ordered more small, closed ones from Rio Grande, in order to connect them all together. I'll admit to being more than a little pleased that I didn't melt any!

As I started assembling the necklace, I realized that although it would have the push lock in the front, it really wanted a clasp in the back to make it easier to take on and off, especially since I had decided to add some of Cari's wonderful briolette charms to the clasp.

Push lock clasp and briolettes from Cari
Rather than trying to make more rings and create a clasp in back, I ordered a short (16 inch) rolo chain, and used it to finish the necklace.  A case of working smarter not harder, especially because it only took about 4 inches of chain, and it doesn't show on the front. 

I simple cut the chain, preserving the clasp, and soldered it to the end of the necklace.

I'm so pleased with the finished piece!


It's always great when something turns out as planned


It's always wonderful when a design turns out exactly as I envisioned it (and that doesn't always happen - when I first started metalsmithing classes my visions waaaay exceeded my ability - and I have been away from the bench for quite a while).

I'm also delighted to have jewelry projects to write about again - so watch this space, class continues until May - and I'm planning on signing up for another semester in the fall!

Up next - new techniques for stone setting - starting with this fabulous faceted turquoise (then the tourmaline and opal).


I hope you are enjoying following as much as I am writing about my projects.

Until next time.


P.S. A few of you asked if I'm going to be making things for my Etsy shop, and the short answer - at least for a while - is no.  I had three great markets at the end of 2019, and then as we all know - things changed - and one of the most important things that changed for me was the realization that I've had a career, I built a business, and I don't need to do it again.  Maybe after a semester or two, I'll change my mind - but right now the best part of making jewelry is learning, and being free to do it simply for my own enjoyment.