Monday, April 25, 2016

04.25.16 Surprise! I like hollow forms (Intermediate Fabrication - part 2)


When I signed up for 201 - the intermediate fabrication class at Creative Side - I was skeptical about the hollow form project.  It was described as a ring - since the only rings I wear are my wedding and anniversary bands, I wasn't sure what I was going to do.  But I talked to our fabulous instructor, De, and she suggested I look online for ideas. She was right, because when I did - I found lots of inspiration, and landed on earrings.

Our first project - the bezel with corners - was really designed to get us ready for hollow forms, and the process of creating a shape, and maintaining it.


With rounded bezels, you can reshape them around the stone before soldering - but with corners, or a hollow form shape - that's not an option...and it's harder than it sounds.

I decided to make a pair of drop earrings, so I used an oval mandrel to shape my metal before soldering the forms closed.  It took three attempts to get the soldering right - but when I did, I had a pair of nicely matched ovals ready to solder on to a backplate.

Once the ovals were soldered down, I sawed off the excess metal and filed down the edges.  The next step was to drill small holes in both the front and top of each piece.  A hollow form has to have a hole to let the expanding hot air out as you solder on the backplate - or your piece will explode.  I drew a grid on the front and top of my ovals before I drilled to make sure the holes would be properly placed..  The hole on the front will end up under my small tube set stone, the one on the top is where leverback earwires will be attached.  That was where I finished on the first of three nights devoted to this project.

In the second class it was time to make the open parts into hollow forms.  With the holes drilled to let the heat escape, I soldered my ovals to another set of backplates.  Honestly I was surprised how easily and well that went.  The rest of the evening, not so easy.  It took a lot of work to make them look like earrings...sawing off the excess metal from the backplates, filing the edges, and lots of polishing. However, at the end of the second class - I had a pair of hollow oval beads!


The third and final night was devoted to finishing and stone setting.  Once the beads were complete, I soldered the wires with jumprings into the top, and small pieces of tubing on to the fronts (to hold 4 mm blue zircons). You would think soldering a couple of little 4.5 mm tubes would be pretty straightforward.  The first one went on like a piece of cake, but  the second one gave me fits! Finally - after multiple attempts (and a move from medium to easy solder) both beads were ready for stones.


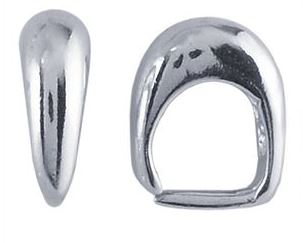
Not only am I very pleased with how this project turned out - I realize that I like hollow forms a lot, and the possibilities for future projects are almost endless!  In fact...I've started another pair - teardrops - already.


I've learned my lesson - always go into a new project or experience with an open mind - even if you're soldering the whole piece closed.

I've learned my lesson - always go into a new project or experience with an open mind - even if you're soldering the whole piece closed.


Until next time.

Monday, April 18, 2016

04.18.16 Warp speed (Intermediate Fabrication - part 1)

Boy, am I glad I have been attending open studio and didn't take too much time off between the end of my Fabrication 101 class last November, and the start of Fabrication 201 a few weeks ago.  No starting slow this time...our very first night we made a bezel setting for a stone with corners...from scratch, so to speak.

We started with sheet silver and a stone of our choosing - and that was it.  We rolled our own bezel wire, shaped it around the stone and soldered it to a backplate in under four hours.  At the end of that class I had a finished bezel and a jumpring - ready to be assembled into a pendant.


Creating a bezel with corners requires a much more precise set of measurements than setting a rounded stone.  The length of each side of the bezel needs to fit the stone exactly, and the bends, or corners, in the wire need to be sharp.  Unlike a round bezel, which can be reshaped around the stone after it is soldered together, the shape of a cornered bezel needs to be maintained throughout the process.


Up to this point, the process was pretty much the same as any other bezel set pendant I had made, but setting a stone with corners is a whole different animal. With a rounded cabochon, you don't have to worry about excess metal ending up in the corners...but it's a real challenge with a rectangular or triangular stone. Making sure the corners stay sharp requires a lot of elbow (and shoulder) grease...thank goodness for my yoga instructor the next morning!

There were some things I did NOT do for this piece...


I didn't put an icon on the reverse. My original sketch has a little heart on the back - but it didn't happen. This is the smallest piece I have made and the backplate is only about half an inch in both directions.  As you can see there really wasn't room to cut much away.

Nor did I make the bail. The bail that I ordered for my lost wax pendant came in a pack of two, so I used the other on here.  It was the right size, worked well with the design and saved time (which was pretty precious on this project).


As I have said before, the instructors at Creative Side are fabulous, and De Pastel, who taught 201, is no exception.  She did a great job of explaining how to work any excess metal away from the corners and towards the center on the sides of the pendant.  The result (after just two classes) - a lovely, dainty piece - with well defined corners.

Until next time.


Monday, April 11, 2016

04.11.16 Hung up on bails

Photo credit: amazon.com
When I started this blog, one of my goals was to "make jewelry more than a hobby"...and in the past few weeks, I realized that is exactly what is happening.

Photo credit: Rio Grande
I've created an account at Rio Grande jewelry supply, joined two Facebook groups devoted to metalsmithing and cabochons for jewelry, I bought a great book, and I've become obsessed with bails.


When I made my lost wax pendant over a year ago, I put a simple silver jump ring on it and wore it happily.  Then I put it on a few weeks ago and thought it didn't look "finished" and it needed a bail.  I went to the Rio Grande website, and found a lovely argentium bail that looked like a perfect match to my pendant. I ordered it and took the pendant and bail to open studio, where replaced the jump ring.  I couldn't believe the impact of that small change, it looked like a completely different - and truly finished - piece of jewelry.  The jump ring was just a way to hang the pendant on a chain, the bail truly completes the piece.

In some ways, telling this part of the story first is putting the cart before the horse...

I started thinking about bails in my Fabrication 101 class, when I began making pendants.  The first one, for my Fordite pendant was incredibly simple; the wire one I made for my laboradite was a little more advanced - the bail followed the shape of the prongs.

As I started working in open studio I began to think more and more about think about the bail as an important component of each piece.  So much so that I ordered a bail template and some specialized wire to customize each bail to the piece.


Having the template is great - I made paper versions of each bail (something I'm doing a lot right now - mocking up pieces with paper - to get a sense of how they will look) - which I can use to to see exactly what size I want for the piece.


This is how I know I am starting to think like a jeweler - I see the components separately, but think of them as something much greater than the sum of their parts.

Watch this space for more bails!


Until next time.


Monday, April 4, 2016

04.04.16 Ignite Your Life with Sarah Gish


At the top of this blog it says “because every piece of jewelry tells a story”…and some are more moving and compelling than others.  This is one of those stories, and it began a long, long time ago.

I started elementary school in Houston in the late 1960s, and despite a move to the Washington DC area in 1974, I have stayed connected to – or reconnected with – many of my Poe Elementary classmates.

One of those people is Sarah Gish – proud native Houstonian, PR maven, artist, philanthropist and all around amazing woman.  A big part of Sarah’s story is her brother, Geoffrey, who died in 2004 at the age of 43, from complications resulting from his addictions.

Last summer, Sarah put up a Facebook post about a new project she was starting – working with sober teens at Archway Academy to make bracelets featuring key words linked to their continued recovery:
1. Trust in spirit…trust
2. Take care of yourself…nourish
3. Meditate each morning…meditate
4. Commune with nature…commune
5. Listen to your heart…listen
6. Be of service…serve
7. Connect with love…love
8. Always be grateful…thank
9. Allow forgiveness…forgive
10. Explore your creativity…create
11. Learn something new…learn
12. Enjoy life…laugh


With that post, she asked if anyone had extra beads they might donate to the project, and I certainly did.

I went through my bead box, sorted out a lot of things I hadn’t looked at in far too long, and sent them off to Sarah.  Turns out, I wasn’t alone – a lot of people did the same thing – and she ended up with quite a stash to start her project.

Fast forward to late last year, when Sarah posted an update about the project.  She said that the kids had made the bracelets with “LOVE and potato chips”, and that these bracelets would be for sale, and the kids would make work.

She also said that she had learned from her brother’s widow that he loved making bracelets – how’s that for karma?

Finally, she shared pictures of some of the bracelets; when I saw they contained some of the beads I’d sent to her, I felt an incredibly fulfilled, happy and grateful.  I have so much – and by allowing me to be part of her project -  Sarah truly gave me a gift.

I can’t think of a better way to start spring - and this season of renewal - than by helping these brave kids - and the wonderful folks who are supporting them – to continue to write their stories.

Sarah’s project is ongoing, and continues to take bead donations ANYTIME.  You can learn more about this project, and her IGNITE YOUR LIFE art project and community campaign by visiting their website (http://www.igniteyourownlife.com/).

If you have extra beading supplies you’d like to destash – and contribute to a great cause, you can ship them directly to Sarah. If don’t have beading supplies, but would like to help – there’s a “donate” button or you can send your contribution to:

Gish Creative
1940-A Fountainview, PMB 116
Houston, TX 77057


Until next time.